Directionless Direction

Directionless Direction

Another New Studio


A trip around the studio on Friday 17th November 2023. This shows the “redfilm” [link] video in its new projection, then moves out of the booth navigating the “three red trees” sculpture and briefly views the three red garden drawings that had been framed at this date before showing the different lighting settings for the NHS lemniscate. The video looks at the comfrey torus and ends on the trees.

Directionless Direction

I took delivery of the frames for the new work on the 17th November and started to frame the existing work. Red Garden One is above, Red Garden Two and Red Garden Three below.

Directionless Direction

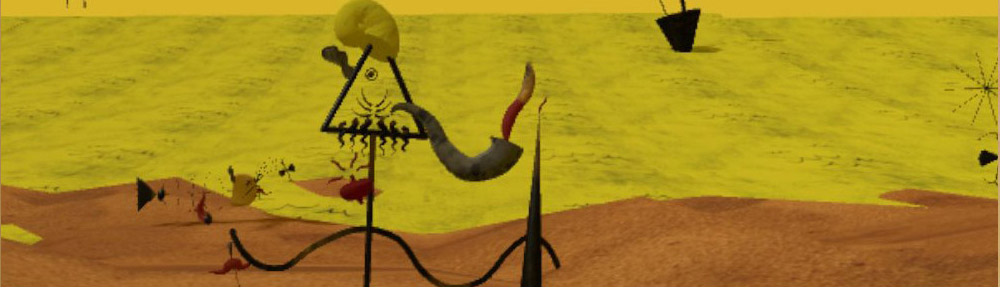
On the 18th I decided that the new iteration of the Redfilm should have statistics about the climate crisis, centred around global warming. I spent the day making the slides and inserting them into the film. The facts were gleaned from the Intergovernmental Panel on Climate Change Sixth Assessment Report March 2023

Via World Resources Institute . The new film was entirely unconvincing and makes the whole concept somewhat patronising, so I dropped it.

On the 19th I found a review of Jewel Spears Brooker, T. S. Eliot’s Dialectical Imagination. Baltimore: Johns Hopkins University Press, 2018. 240 pages. ISBN 1421426528. [LINK]

In which the reviewer, Michelle A Taylor of Harvard University, comments that

“the “deception of the thrush” is that the “world of speculation” can be made real, that the objects of the mind could overcome physical objects, the reality of the body: so Eliot returns to idealism—…—and sees it for what it is. Like interpretation, speculation posits its own world, immaterial, with only some relationship to fact.”

I’ve ordered the book to more fully study this but the meat of it is what I’m exploring the edges of in this current set of work. The idea that the fact of making things as an artist removes from them the possibility of representation because they lack the contingency of design. I suspect that as I reach out for the chance to articulate this the art world itself has fully embraced the contingency of design as a necessary precursor to the creative act. When I was much younger and became a teacher I spent the first ten years of my career teaching design precisely because there are methods and, whilst you can make up the rules you follow, there have to be rules. In art, which I consider absolute, you can’t teach it you just have to do it. This is what I mean by Directionless Direction.

Directionless Direction

On the 20th I made some collages exploring the forms in the big red sculpture and the source for it, two of which are reproduced here. The one above was used as the basis of the bigger drawing discussed further on.

The next two photographs show the drawing “bigred” begun on the 22nd of November and made with inks and pastel.

Also on the 22nd I started Red Garden Four.

At the end of the 22nd it looked like this with the addition of the chainlink and the panel.

Directionless Direction

On the 24th November I added the fence posts and the bushes but decided the piece needed more definition. I added a wash of Indian ink and then painted the sky out with Titanium White oil paint.

I also continued to work on the “bigred” drawing.

Taking it through the stages illustrated above, becoming more like the collage as it progresses.

By the end of the 27th November the drawing looked like this, and the studio was beginning to be ready for the Open Weekend at the beginning of December.

Additionally on the 27th I published the first release of the “doncplatonic” app.

On the 29th I worked more on the “bigred” drawing and started another drawing based on a photograph by a local photographer  Jamie Bubb, with permission, that was posted to threads a day or two before.

I’ll post more of the open day in a separate post and also a more detailed accounting of the reason for it all.

Drawing

I’ve continued to draw every day;

The November drawings can be seen here

and the October images here

There is a link to the previous month’s Gallery on each page.

The drawings are posted to Threads and Instagram each day.

“Isn’t it supposed to be green?”

“Isn’t it supposed to be green?”

NHS Barnsley

Lemniscate sculpture July 23rd – September 18th 2023.

On 23rd July 2023 the Barnsley Facilities Services office followed up on an email from 23rd January 2023 confirming that we were ready to proceed with manufacture as soon as we were paid. Their email stated that they thought the order had been raised earlier, said we would have it tomorrow and could we finish in time for Organ Donation Week which is 19th September 2023. I replied that To answer your question, if I start now and everything goes well then yes, 18th September is achievable. I’ve got enough kit to start work on the build but I will need the money to buy the silicon and the resin within the next three weeks. I can’t start literally straight away as I’m away until Monday 31st.

The last time I referred to this project, or illustrated it was in this blog post – ‘Gardens Project 12: First Post in Three Months’

building the lemniscate

29/07/23

This is a step by step guide to how it happened. I started earlier than I said as I had some materials. This is the first stage of the lemniscate on a wire frame wrapped in mesh and cotton scrim.

"Isn't it supposed to be green?"

progress

01/08/23

I continued to build up the layers to around 100mm girth and balance the shape, but pressures of time meant I couldn’t take the form apart and rebuild the parts that weren’t perfect. I had to build it as close as I could and then sand it back.

"Isn't it supposed to be green?"

finishing (somewhat earlier than ideal)

08/08/23

After a week of adding and sanding I’d reached this form and I had to accept that this was it for the master.

“Isn’t it supposed to be green?”

I am still trying to get in to the studio as often as possible

Beginning the mould making

16/08/23

So I coated it with release agent, and Vaseline eventually. I use clay walls and laid the plaster on to about 25mm thickness. I decided that if I made the mould as three sections around the circumference I’d avoid problems with removing it.

Turning the mould

17/08/23

The next day I turned the piece over and repeated the process with the second run of mouldings.

The finished mould

19/08/23

A couple of days later I applied the final layer.

marking up for removal

20/08/23

And after a day drying, nowhere near long enough, I marked up the mould and

“Isn’t it supposed to be green?”

back to the original

20/08/23

Took the sections off.

the numbered and marked sections

20/08/23

In the end there were 23 parts to the mould. If I’d been a bit braver I might have reduced this to an even dozen. Hindsight is marvellous.

fixing the mould together

26/08/23

So then I put the mould back together after the parts were vaselined for release. This was a pain as the markings disappeared as the mould wasn’t dry enough.

the assembled mould

27/08/23

But here is the hollow mould on the 27th August. I’m awaiting delivery of the resin I was able to order on the 25th when I got payment.

plastering the gaps

30/08/23

On the 30th the resin arrived, and extra plaster so I was able to finish the exterior to prevent leaks.

turning the mould

30/08/23

The mould had to be turned to facilitate this and the process took about 2.5 hrs.

ready for the pour

31/08/23

The lemniscate upended to allow for resin pouring. The pour was made in three parts, the first 15kg over around an hour when there were small leaks around some lower joints. Plaster of Paris was applied to seal these and the mould was left for 45 minutes to allow the resin to reach gel consistency. Then the next 20kg of resin was poured and the process with small leaks was repeated. After another hour, around 4:45 pm the last pour of about 10kg was made. A small amount of Plaster was again used to close a couple of small leaks.

the ‘workshop’

31/08/23

The “workshop” with the lemniscate covered and used resin containers in the background.

the mould is full

31/08/23

The hardened resin at the top of the mould at 8pm on the 31st August. The lemniscate is covered and the resin left to cure for five days.

“Isn’t it supposed to be green?”

building the plinth

02/09/23

Building the plinth

the top of the plinth

02/09/23

The plinth comes in two parts and the lemniscate will be secured by the two aluminium posts on the top. I have the feeling it’s too tall.

the broken original

02/09/23

The original lemniscate was being used as the test piece for the top of the plinth so I could place the holes to secure it. Unfortunately it broke into three pieces before I could test it.

fixing the original

03/09/23

Obviously I still needed to test the positioning of the lemniscate so I have to repair the original. This image shows two of the three pieces placed together ready to be fixed, you can see the connector piece on the left and just about see the break on the extreme left at about 10 o’clock.

cleaning the cracks

03/09/23

A close up view of the break on the left of the photograph above.

fastening the third break

03/09/23

The third piece of the broken lemniscate ready to be fastened. You can see the repair to the right hand side of this break that needed fixing before the whole piece was tied in.

the completed original

03/09/23

The three pieces tied together and left to set. I used plaster of plaster for these with a low water mix for strength and cotton scrim to bind it together. The picture is distorted as as I had to hold the camera above my head to get it all in even with the phone zoomed out as far it would go.


"Isn't it supposed to be green?"

releasing the cast

“Isn’t it supposed to be green?”

05/09/23

The lemniscate coming out of the mould. The mould failed in several places, you can see the spots of plaster stuck to the body at the top left and the mid right. Also the broken broken mould at top right.

While all this was going on I was also visiting the studio, just not as often as I would have liked.

the three pieces fressh from the destroyed mould

05/09/23

The lemniscate almost fully released and in three pieces with very large cast marks where the mould failed to match accurately.

plaster cleaned off

05/09/23

The three pieces of the lemniscate after a first wash. The breaks are pretty much face to face, there are no air gaps, so I should be able to fit the pieces together and fix with epoxy.

grinding the three sections

06/09/23

The cast marks were ground off the separate pieces while I worked out what to do to tie them together.

fixing the breaks

07/09/23

The fixing process for the three pieces, metal rods are drilled into the sections fixed with clear epoxy.

"Isn't it supposed to be green?"

the assembled cast

07/09/23

The three sections fixed together, the epoxy will cure overnight and the piece should be ready for polishing.

cleaned, and a first polish

08/09/23

The lemniscate after a first polish and the removal of the excess rebar.

“Isn’t it supposed to be green?”

the workshop – the aftermath

08/09/23

The aftermath in the working space as I move back closer to the house.

"Isn't it supposed to be green?"

the reduced plinth

09/09/23

The plinth with the lighting solution being installed.

“Isn’t it supposed to be green?”

09/09/23

“Isn’t it supposed to be green?”

This is why I really don’t like commissions, there is a apparently a requirement for the piece to be green as this is integral to the original design. I had no idea that this was the case and found out on Friday, the 8th September, so now it will be green. It will be a bit more of a sap green than the viridian above.

"It's supposed be green isn't it?"

sanding and polishing as much as possible in the limited time available

11/09/23

Sanding the piece as smooth as possible in the limited time available.

"Isn't it supposed to be green?"

Green

11/09/23

Now, it is green, having searched through six year old emails I found the relevant design sheet.

Victoria Hardman’s design sheet

11/09/23

I have a note somewhere about displaying the figure of eight horizontally so people would recognize it as infinity, but it just hadn’t registered that ‘green’ was referring to the colour and the eco credentials.

Isn't it supposed to be green

plinth with original top

12/09/23

The final part of the project was to fix the plinth so that light shines up onto the lemniscate.

Interestingly the support tubes on the plinth above are 540mm apart.

cured lemniscate

12/09/23

The posts fixed to the lemniscate here are 530mm apart. The resin continues to cure and the piece has contracted by 10mm over the past week. So this meant I needed to make a new top for the plinth.

"Isn't it supposed to be green?"

Organ Donation Memorial for NHS Barnsley

12/09/23

This is the final piece with the new top and lights fitted, all that remained was for the lemniscate to be given a coat of lacquer to seal the colour.


Building

Building

(Another New Studio)

I made myself a workbench, a little lower than the display bench, and began to make sculpture based on the lemniscate wave developments. The bench is shown fully in the second image.

building


Building

o

The view of the studio was taken at the end of the day on the 8th June .

Building

Studio 08-06-2023

I spent time thinking about the small wave print below and decided to make one of the circles into a sphere and to make the brown paper line widen over its length.

Building

sphere template

building

lemniscate_cc_wave

Lemniscate_cc_wave is the basis of this sculpture, the others can be seen here.

Building

studio 09-06-2023

At the end of the day on the Day on the 9th June you can see I’ve begun to surface the big zero and the brown paper line and I have the foundation of the spherical form on the display bench waiting to be worked over.

Building

Dark Studio enhanced

I took a very dark photograph on the 8th, that turned out like this with Photoshop automatic tone, colour and contrast.

Building

Arranging lemn_wave parts

After the weekend I finished covering the two parts of the lemn_wave. The sphere was a problem and I couldn’t get it to work as I wanted so I had two frustrating days.

Building

Lemn wave with sphere attempt

You can see one of my attempts here. I was also starting to think about the arrangement of the parts and how they might stay in place.

Given the drying time for glues when the parts were being finished I also went back to the redfilms and hung the circles again.

The redfilms are a found response to climate change, a machine made version of a burning garden with everthing carrying on as normal. It is presented as a double video projection with a fifty percent overlap and the videos starting at different times so that the film changes with each viewing. The films can be viewed on Vimeo.

At the last I decided to use the sections I removed from the ‘o’ to make a spherical shape by crossing the two circles and letting that serve as the form.

Building

Lemniscate wave cc

I think it works.

Building

Lemniscate wave cc

I also had a go at a drawing while I was thinking about the arrangement of forms.

Building

Lemniscate wave cc preparatory drawing