Whatever It Is
Another New Studio
I’ve had a mixed January after time off over Christmas. Lots of time spent trying to get an app from Unity onto the app store, I must have spent twenty hours and it still won’t go on so I’ve resorted to putting the Doncaster Platonics app on the Artivive App.
It works, which is great, but it costs money to use for anything other than minimal output and there would be further charges if the works were viewed more than a 1000 times in a month. That might seem to be a lot of views but the five Platonics drawings are each individual artworks so that’s 200 views each.

Christmas Tree – Oil on Board
While I was at home I painted a Christmas tree, because it was Christmas.

Bird Skeleton
I missed several days studio work after discovering water dripping down onto my stairs from the skylight. This proved to be a hole in the roof so that needed sorting, mostly involving waiting for tradesmen to turn up to quote and then sitting around while the one I chose did the job.
While I was in the roof cavity, off my cellar studio I found the skeleton a small bird, I think it’s a sparrow, and I took it into the studio at c-view to draw. This is 140 cm x 80 cm pencil and pastel on paper. This was started on the 12th of January.

Small Fox
I also painted a small fox while I was waiting around at home and did a lot of digging in the garden.

Bird Skeleton with Red
On the 15th January I was able to get into the studio again and added some red to the bird skeleton and worked over the shadows and some marks on the paper with white paint. I managed to get help to deliver the lemniscate to the NHS at Barnsley Hospital and also got some photographs taken of the work I’ve made at c-view for prints and a new website.

Bird Skeleton with red wash
I got back into the studio on the 19th January and painted the background of the bird skeleton with red ink.

Studio 23/01/2024
I also started a new half sized maquette for the three trees variations in cardboard. I finished this on the 23rd January and made a lidar Polycam scan.

Three Trees Maquette drawing
When I returned to c-view on the 24th I started a drawing of the three trees sculpture, I’ve also explored this in the sketchbook.

Three Trees Maquette drawing
And when I next got in on the 29th I finished it.

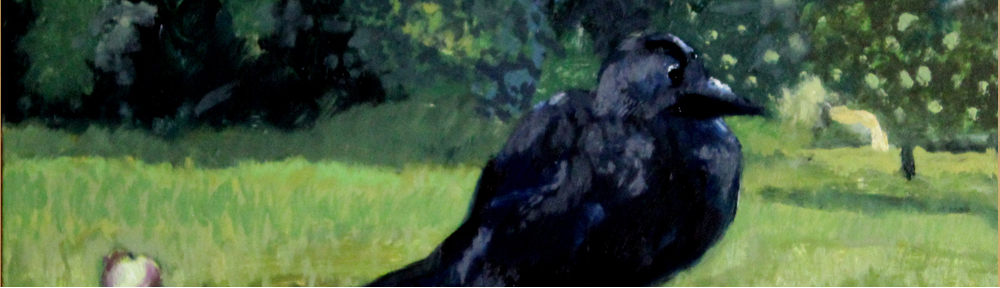
Red Pigeon
I was in again on the 31st, after a lot of work on the app and the background story to the big Gardens Project and I worked the Red Pigeon drawing up to almost finished.
I’m thinking that the Garden is the protagonist of the story for the project, asserting itself by becoming in the presence of ‘you’ as the witness. As simple as it sounds the longer you are present in the garden the more you see and the more you interact the more you find out. The plot may be the reconciliation ‘of’ or ‘with’ a fatal flaw in the main character. There has to be some kind of achievement at the end of it.
I wrote a kind of manifesto for my protagonist. Which garden I am depends upon you. I am the garden growing the fridge freezer and the bin bags full of ignorance; I am the garden organised with gravel and abandoned to dandelions and curly wurly wrappers bleached and wilted; I am the garden clinical in its efficiency, with no room for invasions or unwanted natives, made new every season with garish borders; I am the garden abandoned to ideology, at the mercy of the wind and the moss and the tap roots, and the ‘wilding’; I am the garden that tells you what it wants and where it wants it; You are the garden I am.
I really should find the time to work consistently on this, whatever it is.
A small aside about photographing work, I took the photographs below in my kitchen with the iPad, the picture is 12inches square. I haven’t adjusted the colour in any of them, it is just a question of finding the right light. The one at the right is the closest to reality.

Fox, colour photographs
Drawing
I’ve continued to draw every day;
The January drawings can be seen here
-

Draw Every Day – January 24
Draw Every Day - January 24
Continuing to draw every day, using sketching pens, japanese ...
See photo »
…and the December images here
Draw Every Day - December 23
Continuing to draw every day, using sketching pens, japanese brush pens, a set of moleskine coloured pencils, a Koh-I-Noor 4B and Derwent watercolour and liquid charcoal washes. I also added a set of Winsor and Newton promarker water soluble markers. The 13th sketchbook was completed on December 12th and a new A5 book started on the 13th.
Still doing double page spreads. The drawings are made any time from 9:00 am at the breakfast table and occasionally later in the day if I'm away from home.
The drawings have been posted since the beginning, 6th May 2020, on instagram
https://www.instagram.com/latham_1959
You can see previous months through the galleries page
https://www.ian-latham.com/blog/galleries
or you can go straight to November's drawings here -
-
Draw Every Day – November 23
Draw Every Day - November 23
Continuing to draw every day, using sketching pens, japanese ...
See photo »
There is a link to the previous month’s Gallery on each page.
The drawings are posted to Threads and Instagram each day.